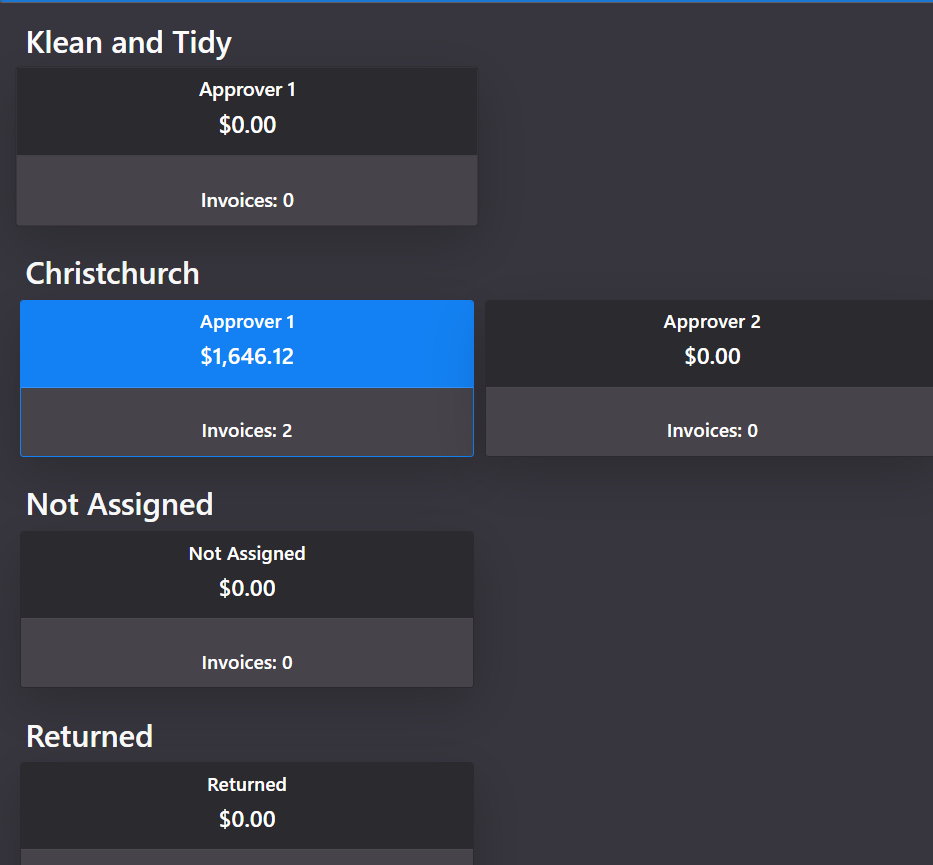
A workflow in Fetch Approvals is where users will see the invoices they are to approve. There can be more than one person approving invoices for a workflow, and these are assigned by Approval Groups.
This is how workflows appear to the user.
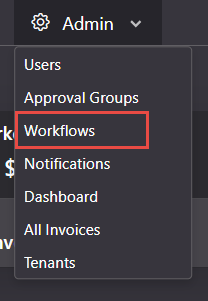
To add a new workflow, go to Admin-Workflows
Press ‘+’ to add a new workflow.

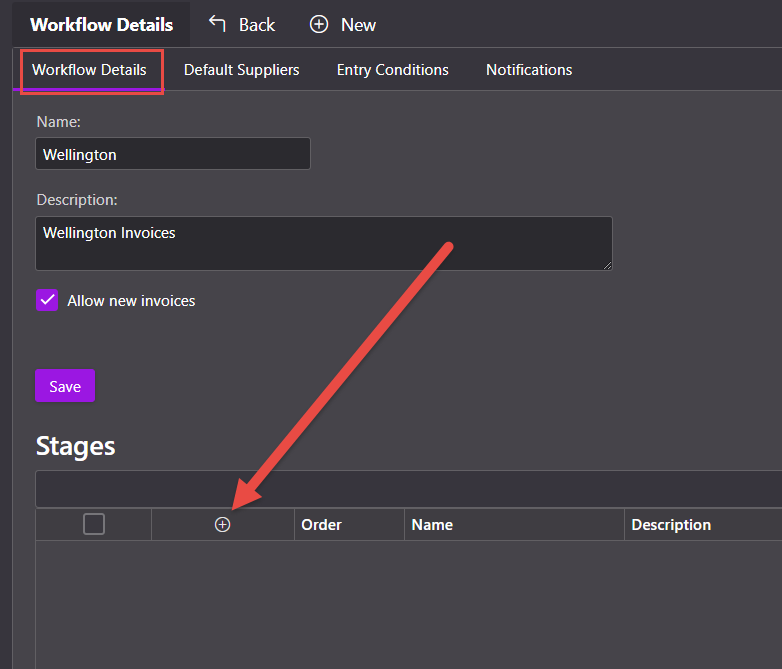
Give the workflow a name and description (optional).
The name might be reflective of a branch (eg Christchurch), or a person (eg Jamie), or a division (eg Tools) or anything else that fits for your scenario.
Ticking Allow new invoices means that new invoices can enter the workflow.
If this is unticked new invoices cannot enter automatically, but can be sent manually to this workflow.
When you press Save, some new options will appear.

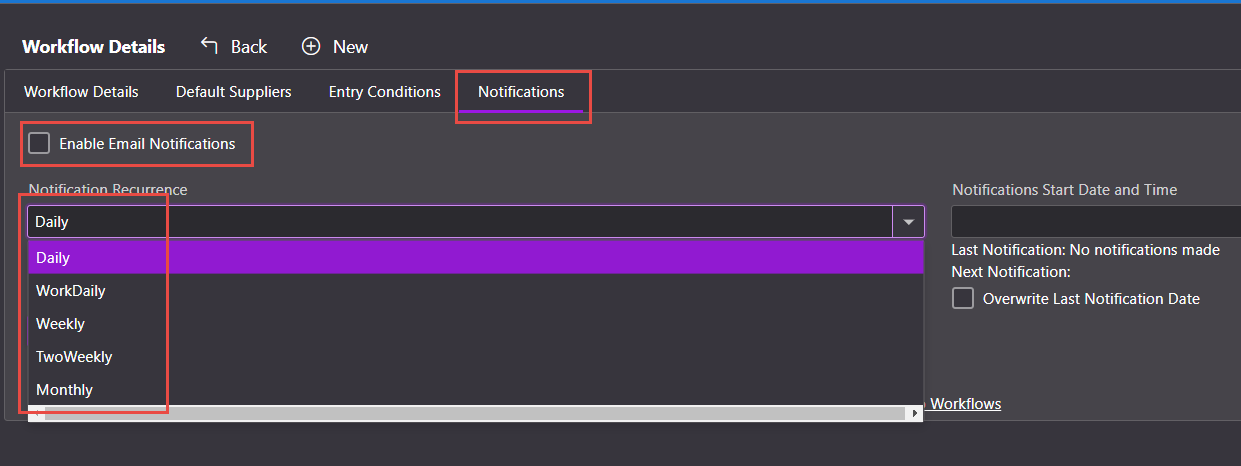
Set Notifications so that emails will be sent by Fetch Approvals, and choose the frequency.
Add the criteria for invoices to enter this workflow.
You can choose Default Suppliers, to select suppliers that will always go to this workflow, you can also select other criteria in Entry Conditions.

In our example, we will set all invoices to be coded to Wellington for this workflow.
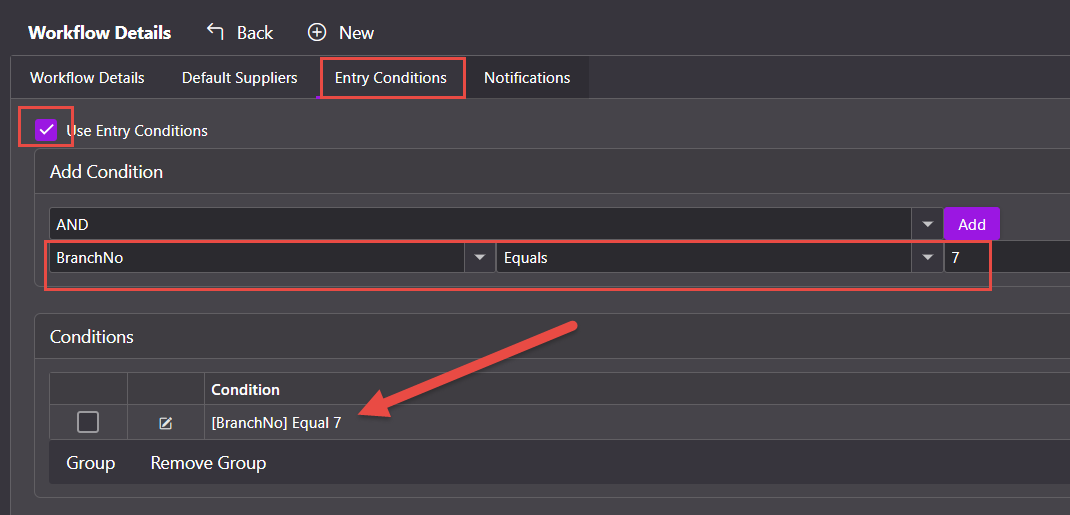
Select Use Entry Conditions (if this is not ticked, invoices will flow into this workflow from the workflow just before it).
From the dropdown select Branch No, Equals, 7 and press Add.
The Conditions show.
There are other criteria you can choose for the Conditions:
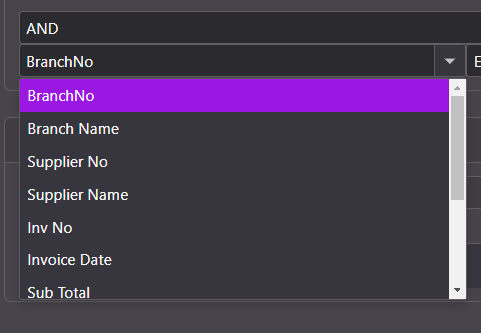

If you want to add additional conditions, use AND or OR and enter the required conditions.
It is the Stages that will appear on Users screens, so these need set up.
You can have as many stages as you like and this is where you will create specific approval rules.
In our example, all Wellington invoices will now flow into this workflow, but we now need to set the stages as there may be specific rules.
We will set up two stages: One that all invoices for Wellington will flow into, and one where only invoices over $1,000 will flow to.
Go to the Workflow Details Tab and you will see the Stages area on the screen.
Click the ‘+’ to add a new Stage.
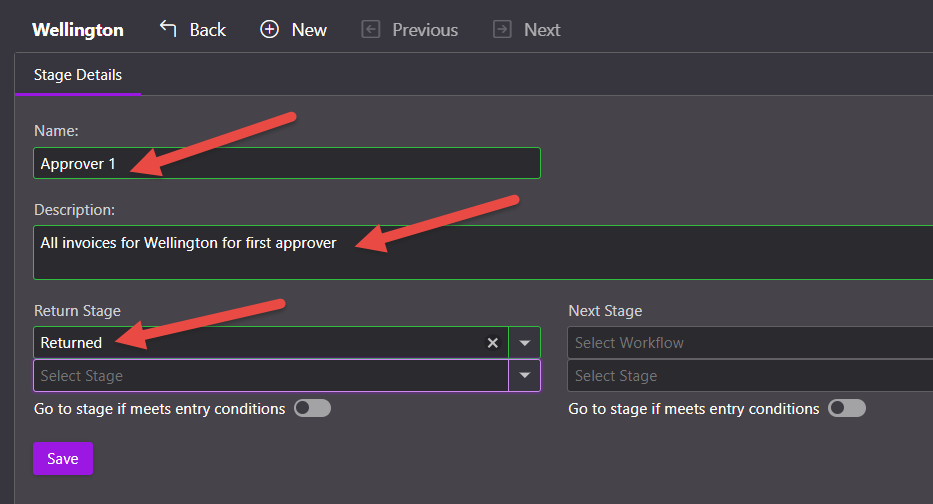
Add the name and description for this Stage, and a Return Stage. You should already have a ‘Returned’ workflow set up which is where invoices that are not approved will appear.
You will only choose a ‘Next Stage’ if these invoices are to go to a completely different Workflow next (eg a particular person, or another Branch Workflow). In most cases this will not be needed.
If you have entry conditions on the Next Stage you can turn on ‘Go to stage if meets entry conditions’. So if this stage has an entry condition of invoices over $1,000 (for example), only those invoices will enter the stage.
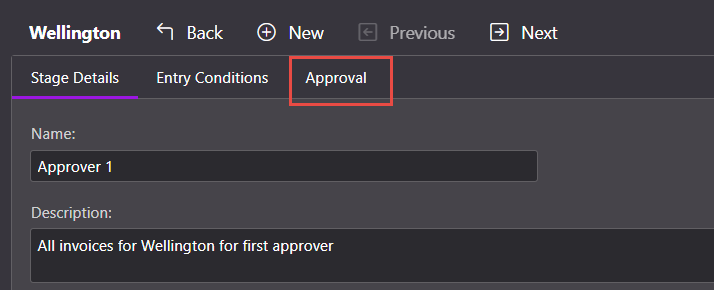
Once you press Save, some new tabs will appear.
We don’t need Entry conditions for this Stage as all invoices for Wellington will automatically flow into the workflow.
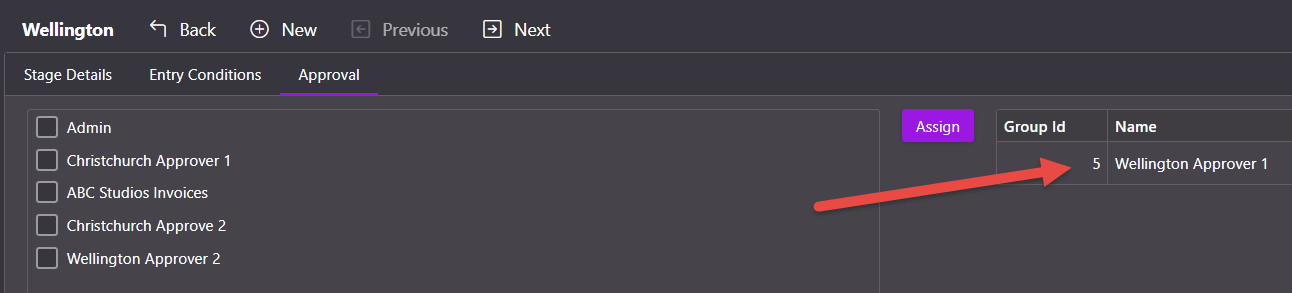
We do need to set the Approval Group who will be able to work with these invoices, however.
Go back to the Workflow and you will see your new stage. This is where you can now add the second stage, if required.

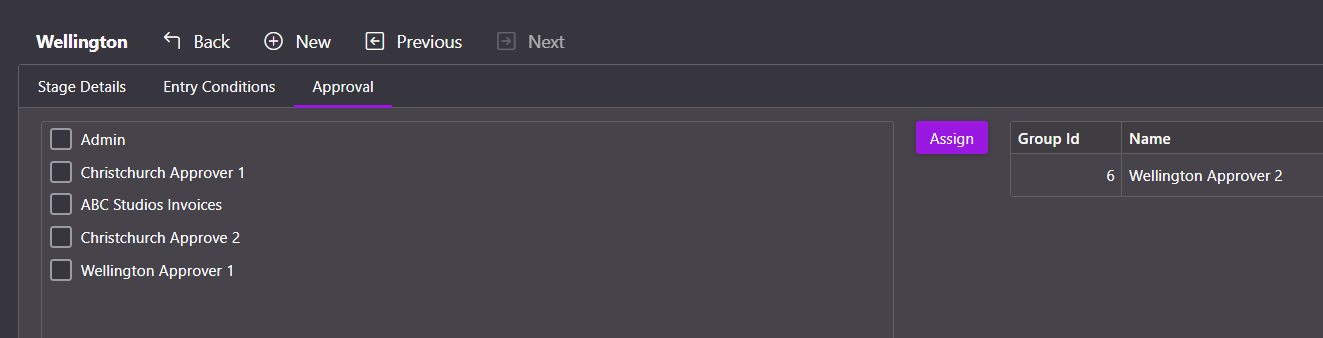
Add the second stage in the same way as before.

We didn’t need Entry Conditions for Approver 1 as all Wellington invoices will go into their queue.
But now we do need to set an Entry Condition – go to that tab.

Add in the entry conditions

Now add the Approver Group who will work with these invoices
The workflows should now appear for anyone who has access to them – they need to be in an approval group linked to one of the Stages.
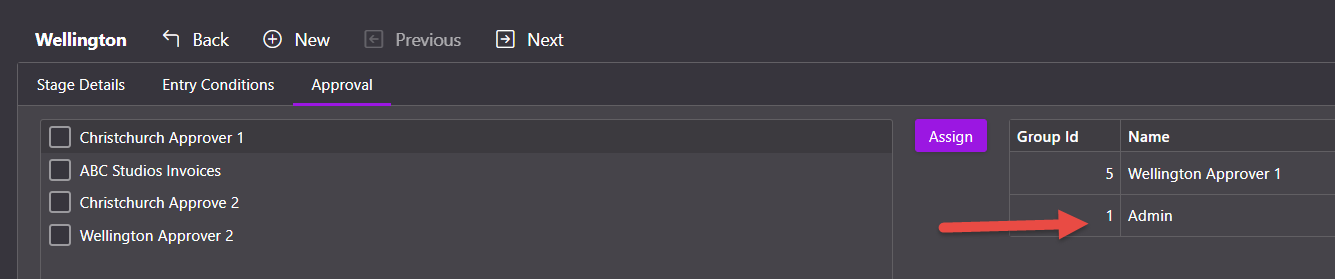
If you, as Admin, would like to see these workflows, add the Approval Group that you are in to them.
The workflow is now available.
We suggest you test an invoice for this workflow to make sure it is set up correctly.
Log in as the User who will be approving and make sure they see the Workflow.
Send an invoice through and make sure it shows in the correct workflows.
 Welcome to Fetch Help
March 22, 2023
Welcome to Fetch Help
March 22, 2023
 When invoices pages are merged or split incorrectly
May 31, 2024
When invoices pages are merged or split incorrectly
May 31, 2024
 Changing Approvals Criteria for Invoices in Fetch Approvals
April 24, 2024
Changing Approvals Criteria for Invoices in Fetch Approvals
April 24, 2024
 Setting up a new Workflow in Fetch Approvals
April 24, 2024
Setting up a new Workflow in Fetch Approvals
April 24, 2024
 Adding a new user in Fetch Approvals
April 24, 2024
Fetch Approvals for Admin Team
January 4, 2024
Adding a new user in Fetch Approvals
April 24, 2024
Fetch Approvals for Admin Team
January 4, 2024
Comment
Leave a Reply